This document provides instruction for more advanced WordPress users on how to edit a page using the visual editor in WordPress.
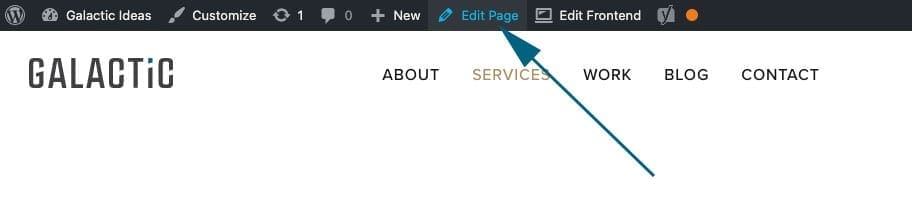
Step 1: Press the Edit Page button.
You must be logged in to your website and have WordPress Admin role access to edit a page on your website. If you have met this criteria, press the ‘Edit Page’ button at the top of the page in the WordPress menu. This will load the backend view which enables a more advanced WordPress editor the tools to make updates to a page.
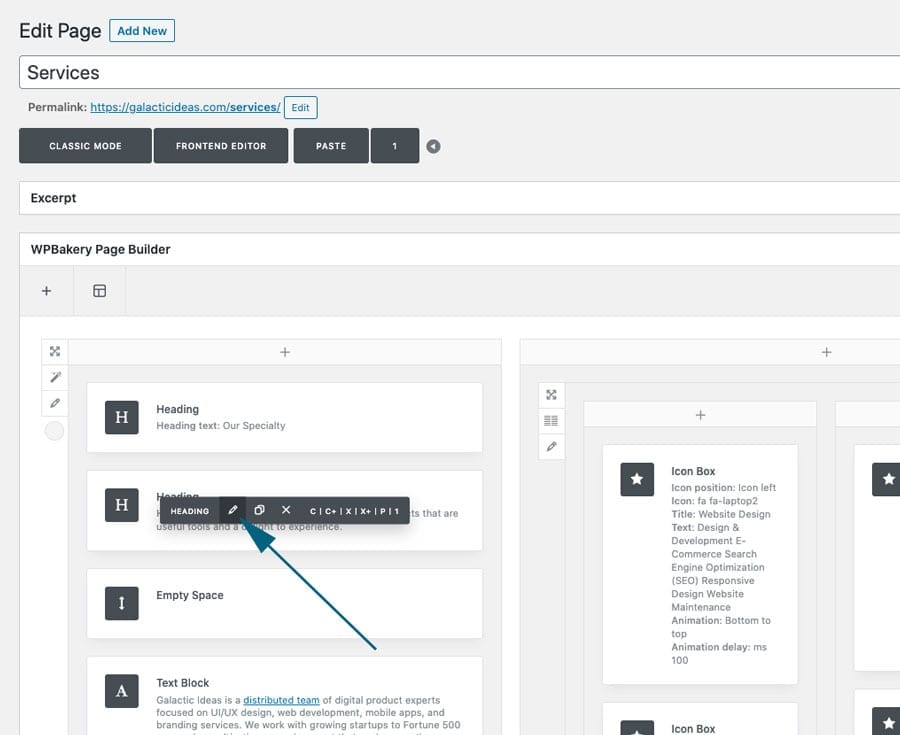
Step 2: Edit within the visual interface.
The Visual Composer editor displays your page elements in rows and blocks. When you hover over the blocks, you will editing tools that correspond with the element. Press the “pencil” (edit) button on the element you want to edit. This will bring up the element’s text editor option.
Step 3: Enter your changes within the text editor.
The text editor will look something similar to a Microsoft Word document. Make your changes and then press the ‘Save Changes’ button at the bottom of the pop-up window. If you are copying in text from a website or Word document, it is best to do so within the “Text” tab (rather than “Visual” tab) on the text editor. This avoids copying in CSS styling stuck on your text which can give you results you probably do not want. By default, the “Visual” tab is selected.
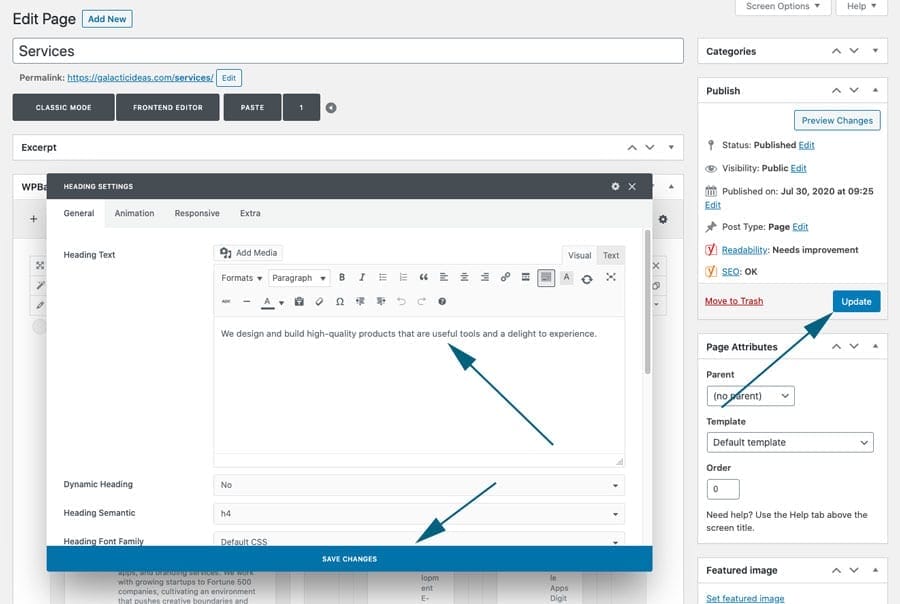
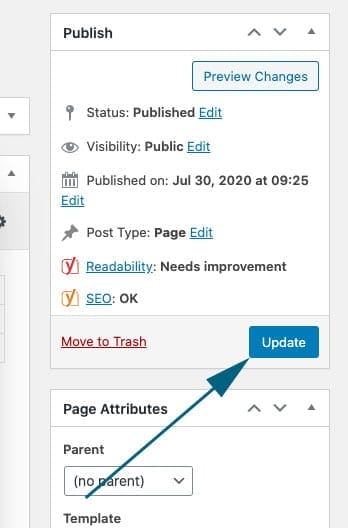
Step 4 (Final Step): Publish your changes.
You must press the ‘Update’ button on the top right corner of the page to publish your changes. Many people forget to press this button as they think their previous step (save changes) will publish their changes.
Please email us if you have any problems or ideas to improve these instructions.