When uploading images to your website, there are several factors to keep in mind in order to avoid slowing down your website's load times. This article will discuss these factors and the ways in which you can optimize images to best support web operation.
Image File Size and Page Load Time
Humans are notoriously impatient, especially when it comes to internet speed. BBC reported that 50% of consumers won’t even wait 3 seconds for a webpage to load before exiting. In addition, while the Google SEO algorithm is rather secretive, it is well known that page load speed plays a large part in a website’s SEO rankings. Meaning that as page load time increases, your website SEO ranking will fall, and when people access your website, a matter of mere seconds can determine if a customer stays or leaves your website.
A main source of increased page load times comes from large image file sizes on your website. The file size of the images on a webpage is directly related to the speed at which that webpage operates. As such, if the file size of an image is too large, the entire page could be affected. In order to decrease load times and encourage customers to stay on your website, it is important to properly save and upload images at a desirable file size.
The most common way to adjust and save images at optimal sizes is through photoshop.
Editing Image Size in Photoshop
STEP 1. Upload your image and identify the Width (W) and Height (H). An ideal image size for a landscape-oriented image varies depending on the source destination that you are replacing. For example, a hero image for a page or blog post will most often have an aspect ratio of 16:9 or 21:9. On the other hand, when embedding an image on a blog post, the size of the image will depend on the width of the text of the blog post (you want the width of the image to match the width of the text).
- Please note that when replacing images, it is important to match your destination aspect ratio. For example, replace a landscape image with a landscape image of identical ratio, a square image with a square image, a portrait image with a portrait image of identical ratio, etc.

STEP 2. On the menu bar on the top of your screen, select “Image” and “Image Size…”
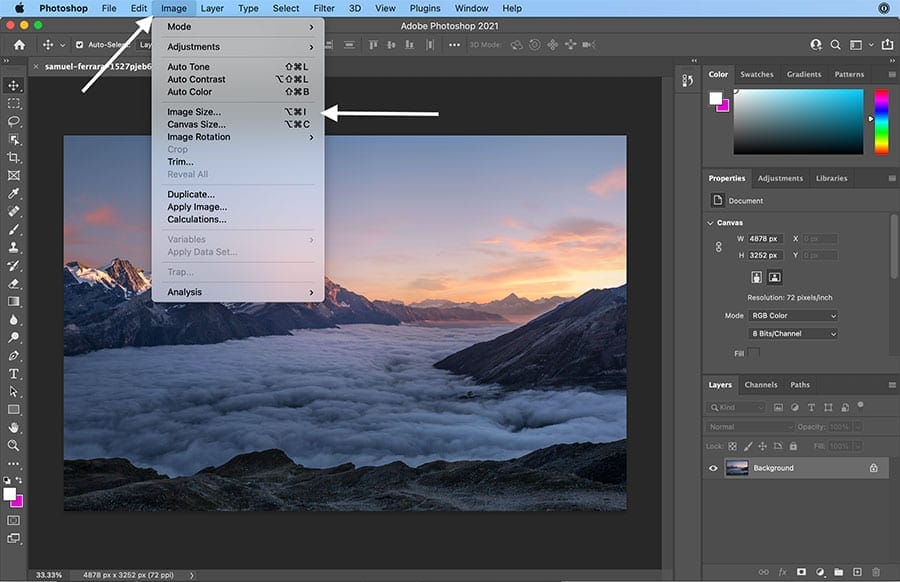
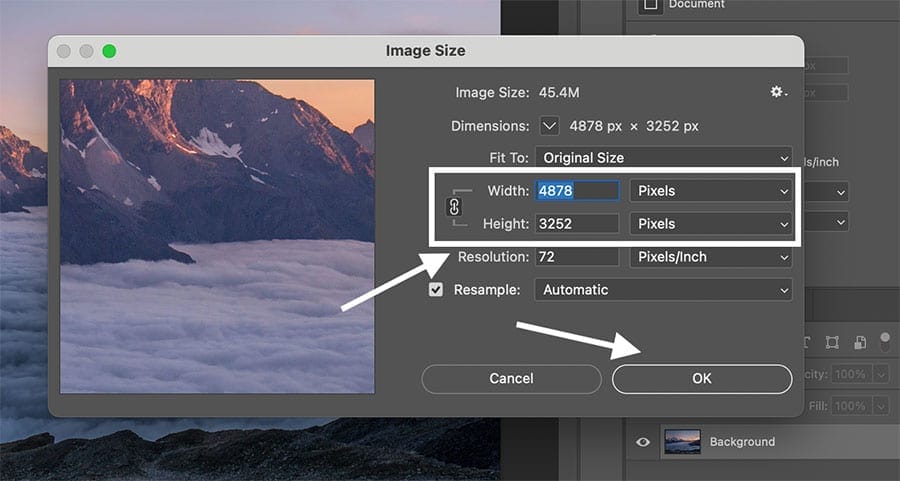
STEP 3. Identify the width and height and adjust the width to the desired size, the height will automatically scale. Additionally, be sure that the image resolution is set to 72, the universal resolution for images on the web. Select OK.
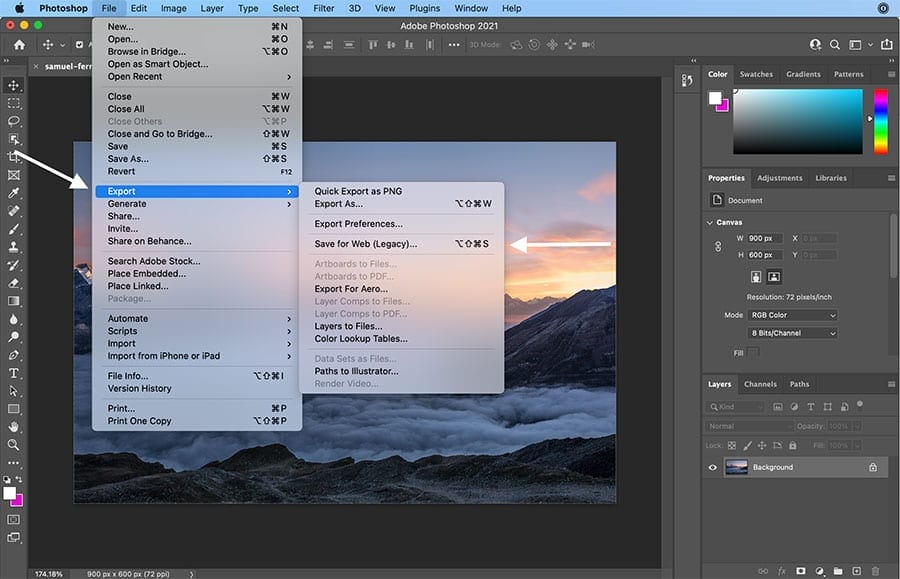
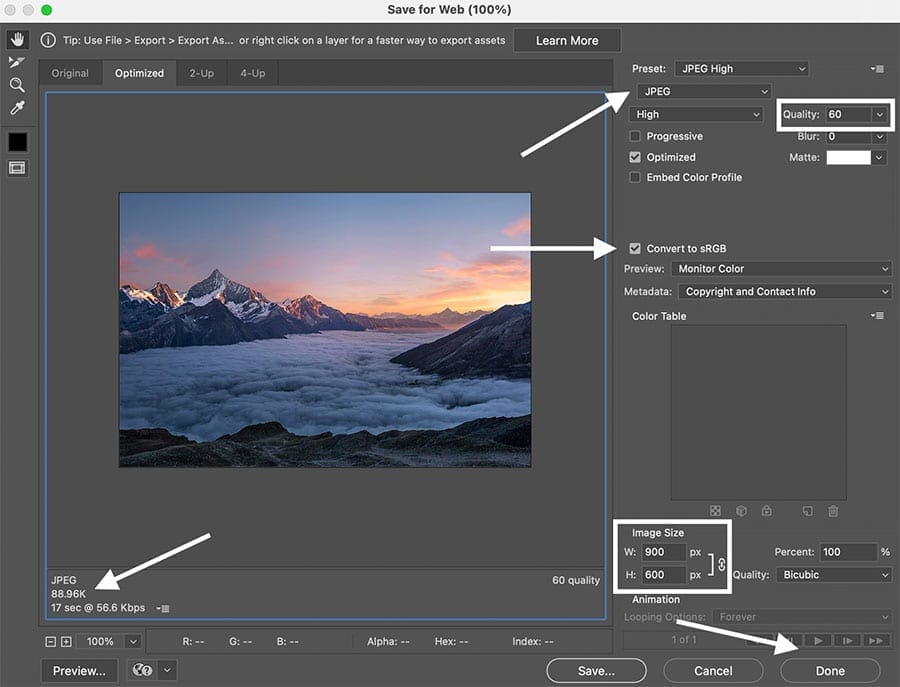
STEP 4. To save the image, select “File” on the menu bar along the top of your screen and select “Export > Save for Web (Legacy)”
STEP 5. In the top right corner, make sure the file type is either a JPEG or a PNG. In most cases, a JPEG should be used; the only case in which a PNG should be used is if the image has a transparent background, such as a logo. In the bottom left corner you can find the file size of your image. The smaller the file size, the faster your page will load. To further decrease the file size of your image, you can adjust the quality in the top right corner, or continue to adjust the height and width measurements in the bottom right corner. Finally, make sure the box that says “Convert to sRBG” is selected.
If You Don't Have Photoshop, You Can Edit Images Through WordPress
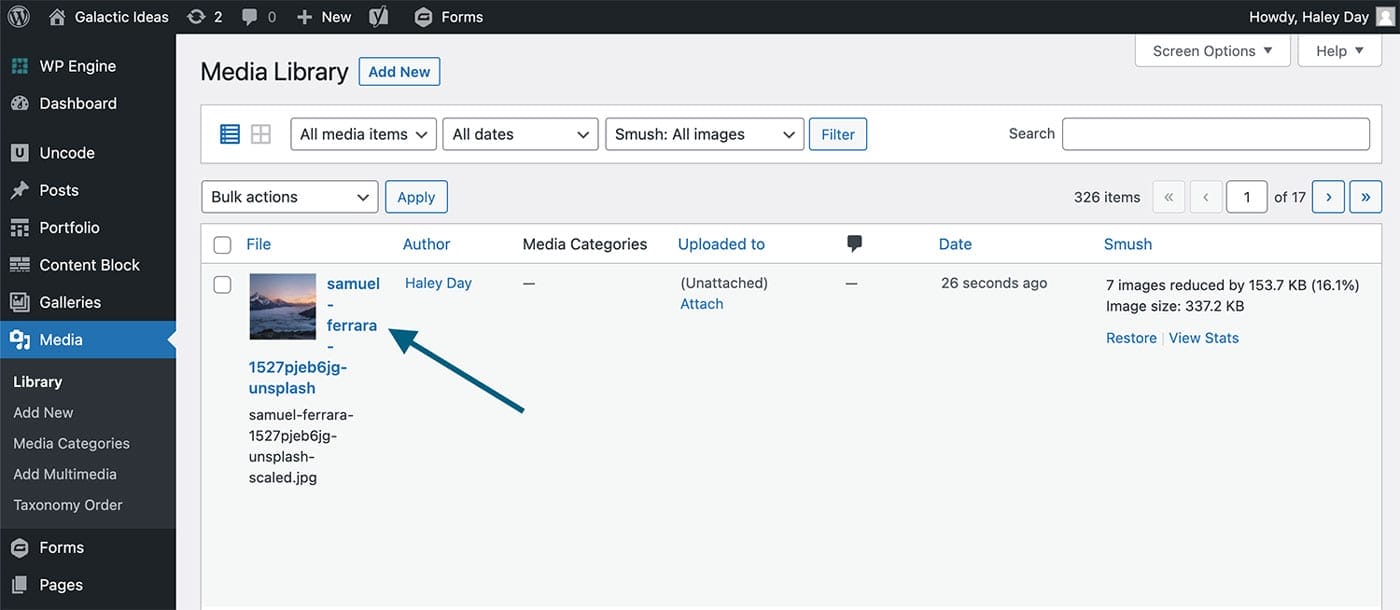
STEP 1. Upload your image and select it from your Media Library.
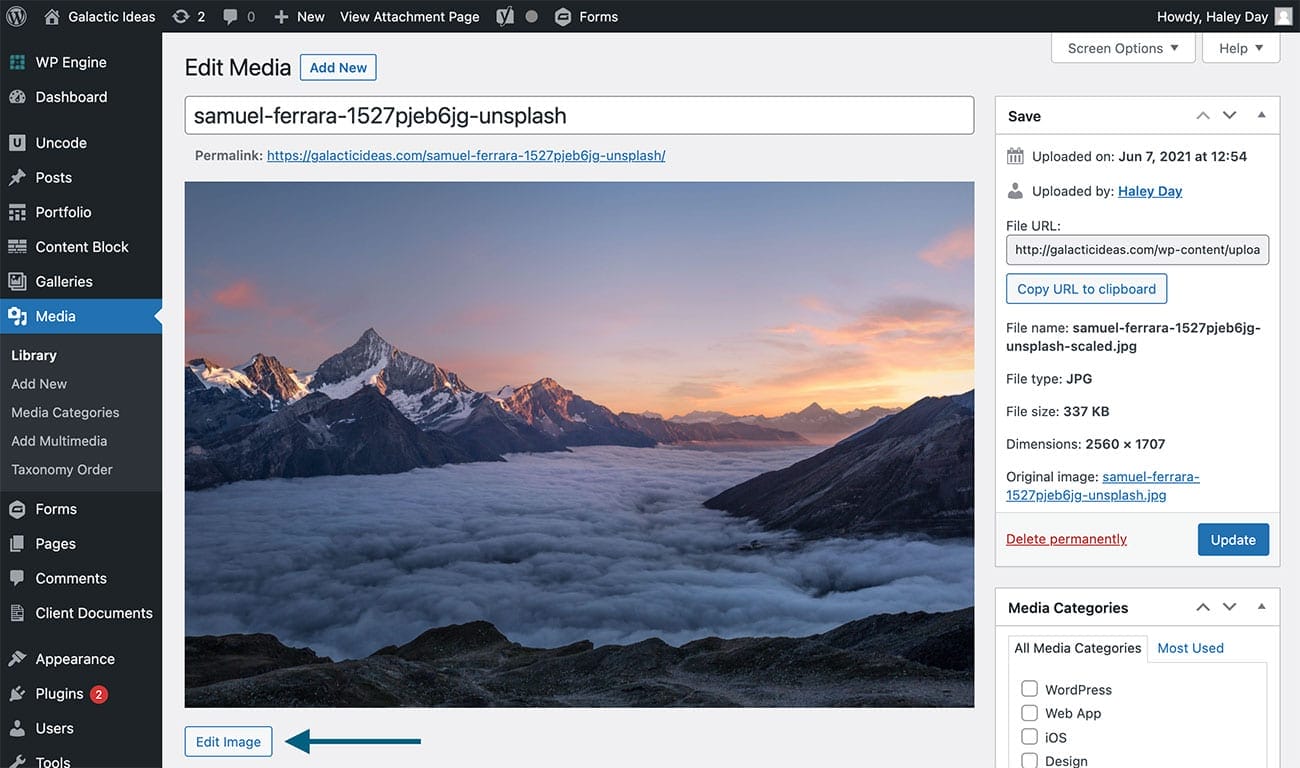
STEP 2. Select “Edit Image.”
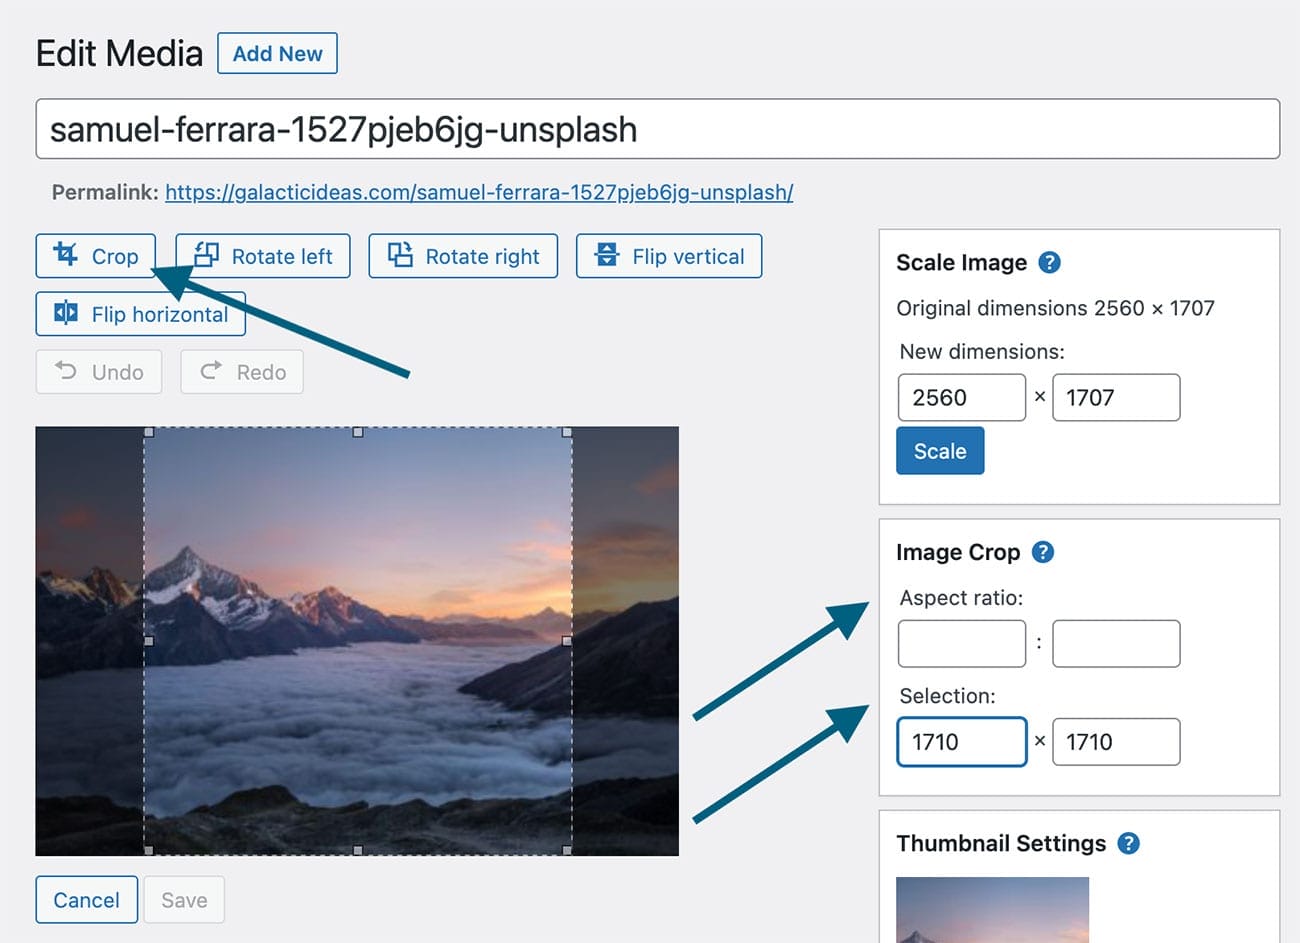
STEP 3. To crop, select the “Crop” button. If you do not want to crop your image, skip to STEP 5.
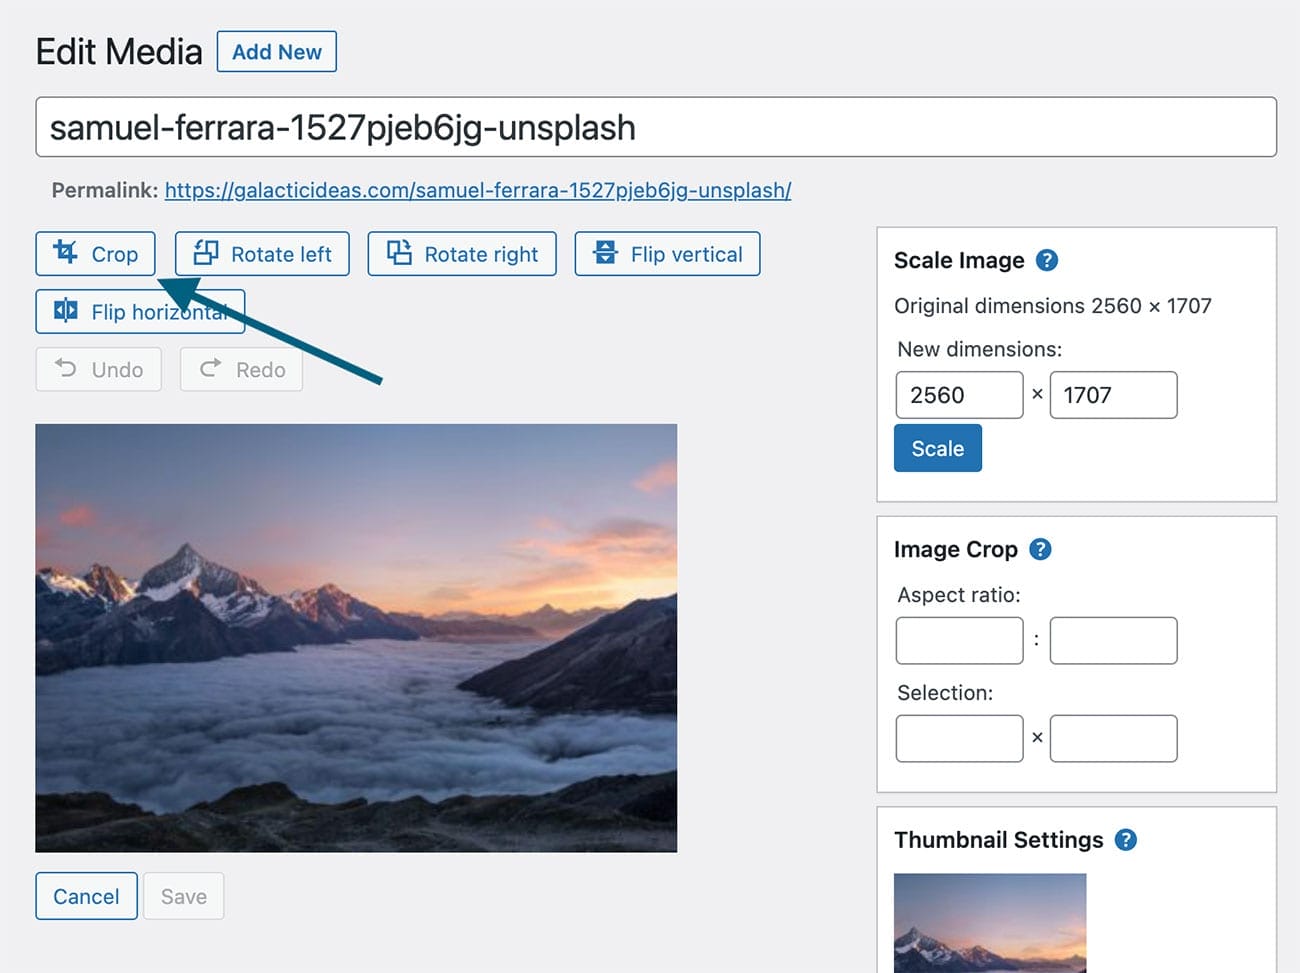
STEP 4. To crop, you can either manually drag the sides of the crop tool to the desired location, enter an aspect ratio, or enter a selection value. To complete your crop, select the “Crop” button again.
STEP 5. To adjust the size of your image, you can enter new dimensions in the “Scale Image” field, select “Scale,” then save your image adjustments.
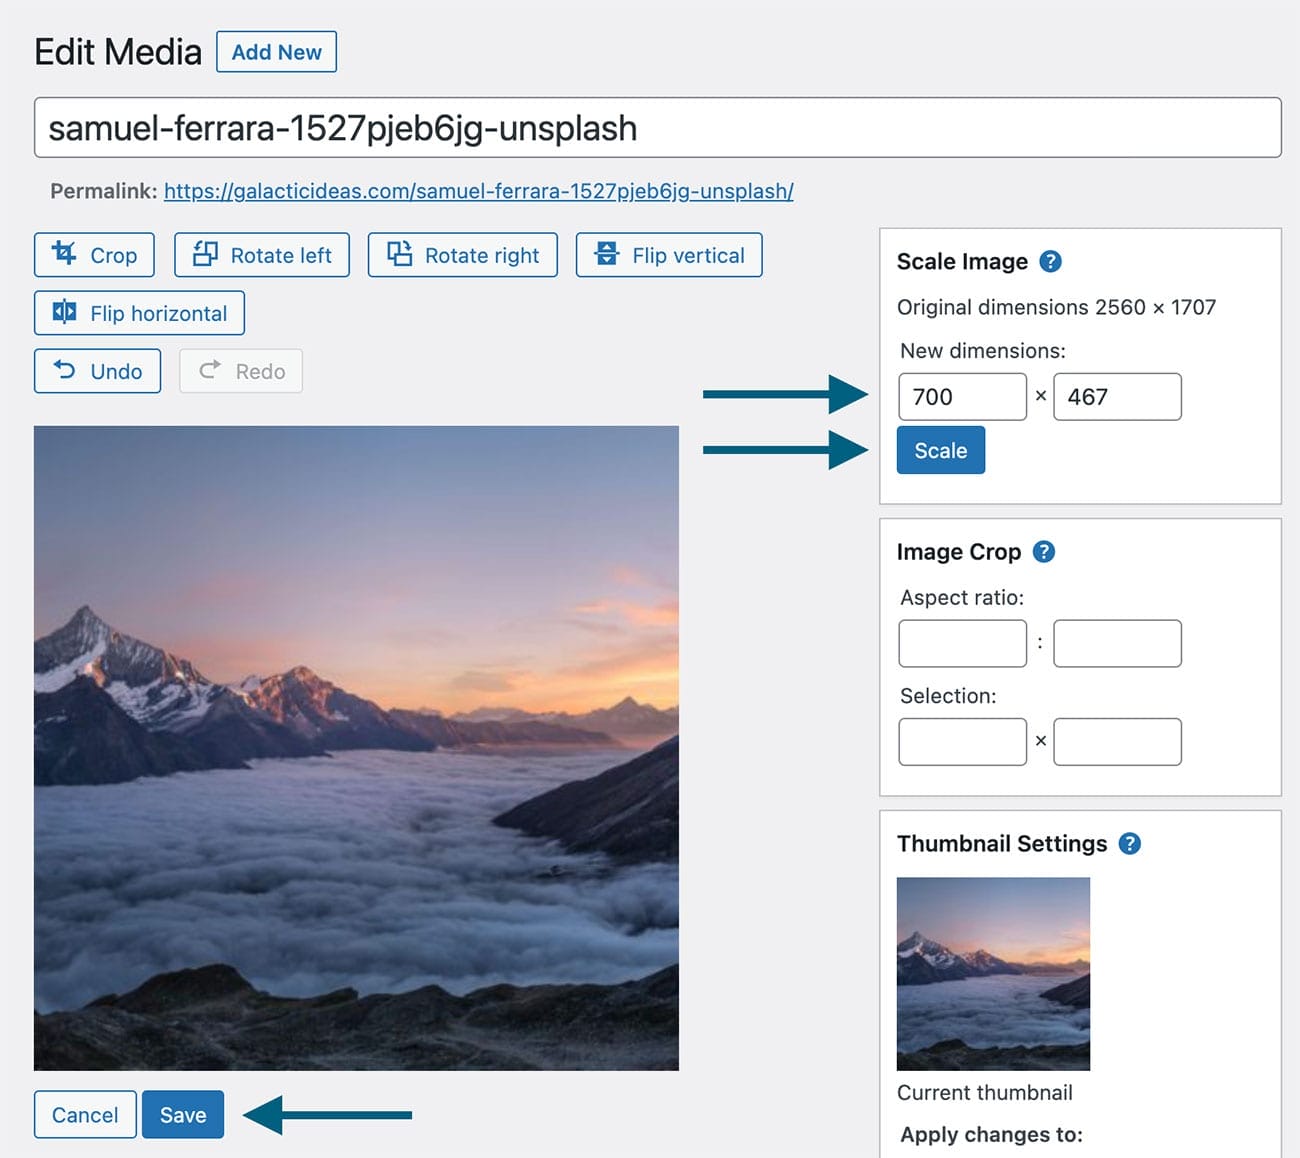
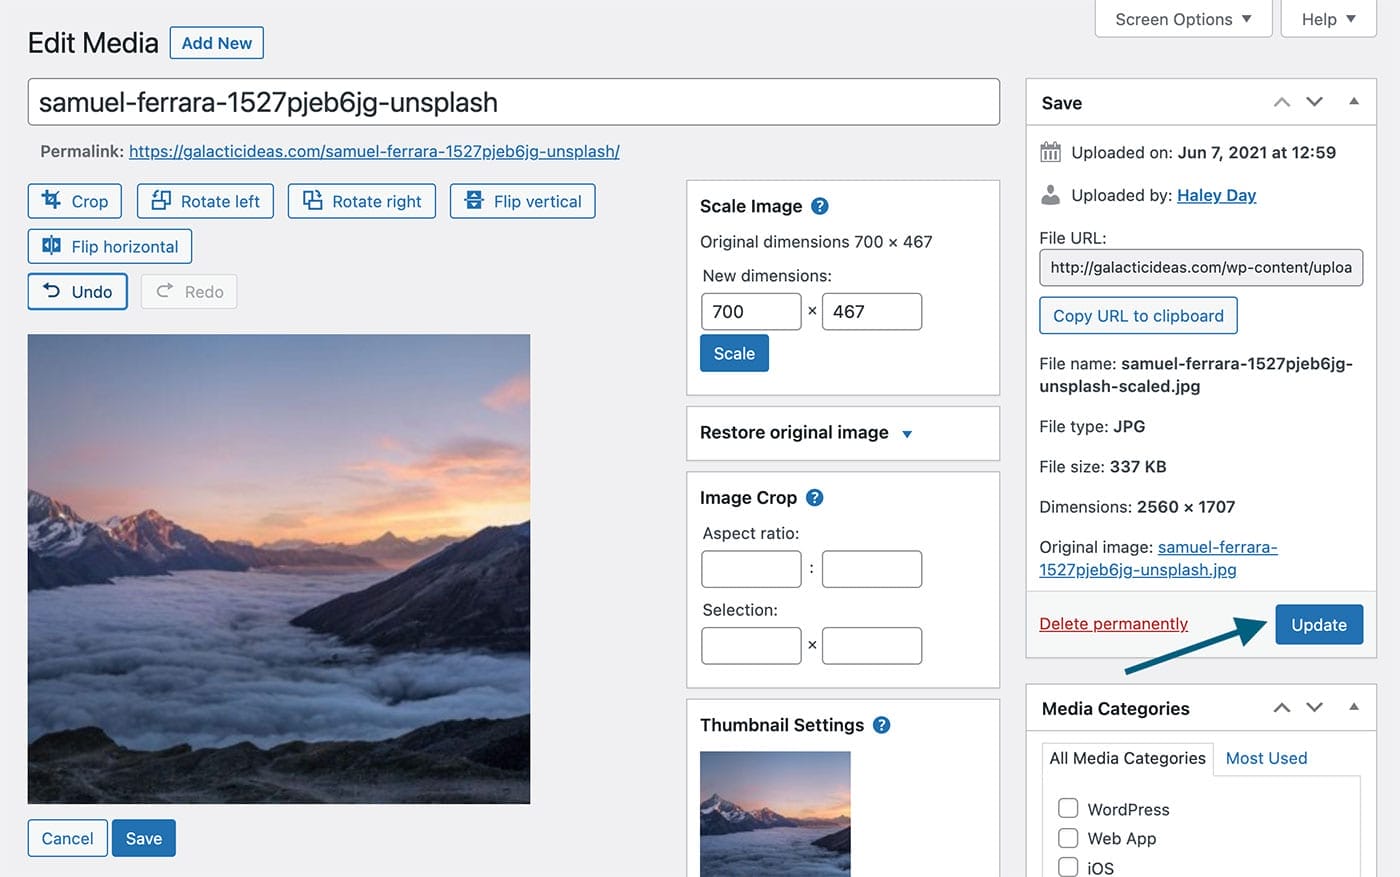
STEP 6. Finally, select “Update” to save your changes.
After uploading your scaled images to WordPress, check out this article to optimize your website media for SEO and accessibility purposes.
Please email us if you have any problems or ideas to improve these instructions.